Monday, January 21, 2013

Sprouted Lentils

I cannot say enough good things about this little legume. Interested in finding out more about the health benefits?  Click here or here for more information!  This post is going to outline the basic 'how to's' of sprouting your own lentils.  I learned how to sprout lentils from browsing the internet and was amazed that I am only just now reading about this. I remember when sprouting your own alfalfa seeds was a trendy thing to do, but sprouting lentils (and many other seeds, grains and beans) is a  relatively new one on me.  Watch out!  I've been sprouting up a storm ever since and usually have a nice batch of these phytochemical-filled beauties in the fridge and available for my stir fries, mushroom/lentil tacos, or my huge tossed salads.  Here's what you need to start sprouting your own:

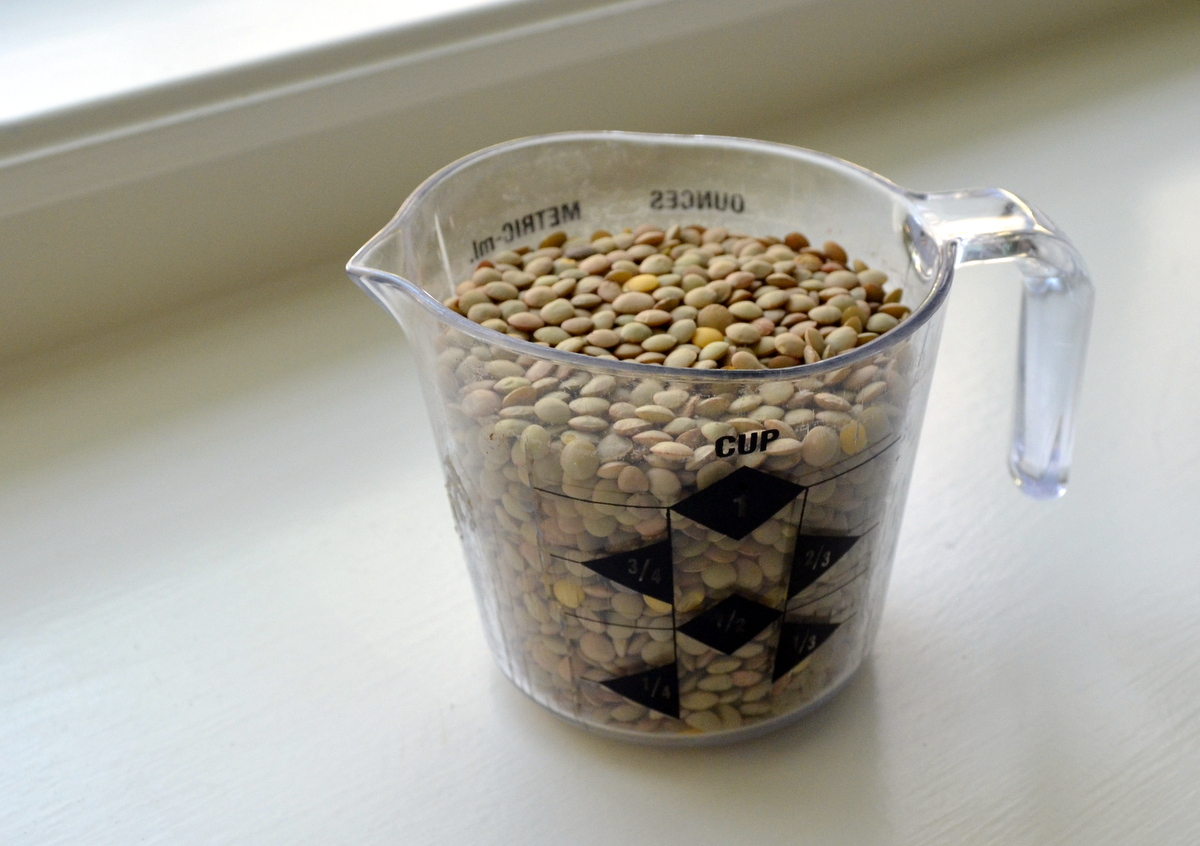
**1 cup dry lentils (any kind will do, I use basic brown lentils)  
glass bowl 
colander

**This one cup of dry lentils will absorb water, swell and sprout and yield approximately 5-6 cups of sprouts.  (Pictures to follow and will tell the story better than any amount of writing.)

Day 1 (Evening):  Rinse lentils thoroughly, drain.  Place your lentils in a glass bowl and cover with fresh water.  Cover bowl with dish towel and let sit overnight on counter, 8-10 hours.

Day 2 (Morning):  Drain your lentils, rinse well and transfer your lentils to a colander.  Set colander over another dish to catch water drips. Cover lentils with towel.  Leave out on counter top.

(Evening):  Repeat Morning ritual.  Rinse lentils VERY well (if you are feeling bad about all the water that you're using for this project, just catch the rinse water in a large pot and use it to water your plants) and return colander to drip bowl and cover for the night.

Day 3:  Repeat directions from Day 2.  You should see some lentils beginning to sprout by now.  I can usually spot a few of them 24 hours from the beginning soak.


Day 4:  Repeat same as previous days.  Good rinse in the a.m. and again before bedtime, cover and let sit.
Sprouts are trying to escape through the bottom of my colander :-)


Day 5:  You should see some serious sprouting.  


I recycled a 12-oz. Baby Spinach container to store my lentils in the fridge.  They stay fresh a long time!

Couple of Notes:  After sprouting for a few months now, I've got this process figured out.  It takes me about 5 days from first soaking to first meal. You can certainly use the sprouts sooner or let the sprouts grow past the five-day mark.  After you've sprouted your own, adjust accordingly.  I sprout these babies to about 1-2 inches...and then only nuke them in the microwave for a minute if I add them to raw salads.  If I'm using the sprouts in a sauteed dish, then they will get a bit of cooking in the hot pan and don't need to be steamed beforehand.  Some folks like them raw, I prefer the taste after they've been steamed just a tad.

I look forward to posting a few of the recipes that feature these tender sprouts.  Yummers!

Saturday, January 12, 2013

Please, Sir, I want some more...

In my humble opinion, this is one of the most nutritious and filling breakfasts ever! Hot oatmeal cereal, sweetened or not, with milk or not, some dried fruit and nuts or with fruit on the side.

Old Fashioned oats is good enough for this granola girl but you may prefer steel cut oats.  I've even picked up the 'quick cook' oats since learning that they are nutritionally identical to the 'old fashioned' and I can make my own "instant oatmeal" packet-like servings with the 'quick cook' variety.

I prefer my hot cereal with a bit of almond milk and a few pumps of the Parkay spray, a dusting of cinnamon and dry Stevia sweetener and a few raisins tossed into the oatmeal and water before cooking.

Two methods of cooking I have success with:

1)  For old fashioned oats, I use a large 4-cup, glass measuring bowl.  Mix together 1/2 cup oats and 1 cup of water and 1 tablespoon of raisins.  Cook for 5-6 minutes on power level 6. 

2)  For "quick cook" oats, I place 1/2 cup oats and 3/4 c. water with a few raisins in a regular microwavable cereal bowl.  Add your sweetener and any other spices, too.   Microwave for 1 - 1 1/2 minutes on high.  This will make your oatmeal a bit stickier than method number one but I love making my own "instant oatmeal" to my own taste and liking. 

Just like those 'flavored instant oatmeal' packets you buy at the store, you can  DIY (Do It Yourself)) at home; this is so much healthier because you know what has been added.  Add some of these to your cereal after it's finished cooking

*half a banana with 1 tsp of cocoa powder

*sugar and cinnamon (I use stevia and cinnamon) with pureed pumpkin or leftover sweet potato
*grated apple with a tablespoon of raw almonds, walnuts or pecans, chopped
*blueberries, raspberries, or strawberries and drizzle of 100% maple syrup


Monday, January 7, 2013

Chocolate Banana Smoothie

Sweet and simple.  Throw in a little more milk for a larger serving portion and a few ice cubes to make it go farther.  I've added 'spinach' to this smoothie before but decided to keep this recipe in the 'ungreen' category.  This taste treat is also worthy of a mid-afternoon snack break or after dinner dessert.

There should be a comma after "almond milk" as the 'vanilla/unsweetened' describes the almond milk.  I prefer the 30-calories-per-cup variety.  Yummy stuff!

Enjoy!

Sunday, January 6, 2013

Lunchbox Chocolate Chip Cookies

I found this recipe in "Forks Over Knives:  The Cookbook."  So glad I did.  My prior attempts at a healthier cookie always left me wanting.  The secret ingredient in these beauties is almond butter and it makes all the difference in the taste!   Now my 'go to' cookie recipe and really hits the spot when I have a cookie craving.  A note of caution:  It's hard to eat just one.  So, I don't even try.  When the cookies are baking in the oven, I brew up a fresh cup of coffee or tea.  When my tea is steeped to perfection, the cookies are ready to come out of the oven and I serve up THREE of these taste treats and Enjoy every bite.  The rest I store in the freezer and remove a few at a time for that next cookie craving.

Makes 24 Cookies

1/3 cup unsweetened applesauce
1/3 cup almond butter
1/2 cup dry sweetener (I use Stevia)
1 T. ground flaxseeds
2 t. pure vanilla extract
1 1/3 cups rolled oats (I use closer to 1 1/2 cups since dough is very sticky)
1/2 t. baking soda
1/2 t. salt
1/4 cup sorghum flour or whole-wheat pastry flour (I use the latter)
1/2 cup grain-sweetened chocolate chips (Easy to use less.  I can get away with using only 2 T. and prefer regular semi-sweet mini chocolate chips.)

1.  Preheat oven to 350 degrees F.  Line two large baking sheets with parchment paper or Silpat baking mats.
2. In a mixing bowl, use a strong fork or wooden spoon to beat together applesauce, almond butter, sweetener, and flaxseeds.  One relatively smooth, mix in the vanilla extract.
3.  Add in the oats, baking soda, and salt and mix well.  Add the sorghum flour and chocolate chips and mix well.
4.  Drop by small spoonfuls of batter onto the prepared baking sheet in about 1-1/2 T. scoops, about 2" apart.  Flatten the cookies a bit, so that they resemble thick discs (they won't spread much at all during baking.)  Bake for 8 to 10 minutes.  The longer you bake them, the crispier they will be.  
5.  Remove cookies from the oven and let them cool on the sheets for 5 minutes, then transfer to a cooling rack and cool completely.

Final Notes:  After making these cookies several times, I've found that my smallest melon scoop works very well for a uniform size cookie and makes closer to 30 cookies rather than the 24 the original recipe states.  Also, I squeeze all the cookies onto one large cookie sheet, leaving less space between each cookie, no problem. 

Enjoy!  And special thanks to Isa Chandra Moskowitz for her contributions to this cookbook!


Saturday, January 5, 2013

Favorite winter fruit salad


I like my pineapple chunky, from the can, in its own juice. I use some juice in the salad and reserve some for my morning Emerald Elixir smoothie.  By all means, use fresh pineapple if you prefer!

Tangerine Cuties are abundant at this time of year.  I peel them, pull apart the sections, remove any seeds and cut each section into thirds.

I like my grapes purple and seedless and cut them in half.

I buy only unsweetened coconut, prefer my almonds unsalted and I use very few dried cranberries--just enough so I get one or two in every bite.  If I have an orange on hand, I zest it and squeeze some of the orange juice over the entire batch of mixed fruit.

Making extra of this salad is a good idea!  Keep it in a sealed container in the refrigerator to have on hand for any time of the day or evening.  Perfect dessert or for that time you desire just a little something 'sweet.'

ENJOY!

Cauliflower Soup


This is a simple soup to make.  A bit of time and the following ingredients are all that is required to achieve this 'scrumptiousness in a bowl.'

Here's what you'll need:

Soup Base

2-4 cups cauliflower florets and thinly sliced stems, fresh or frozen.  I use an entire head of cauliflower or one 16-ounce bag of frozen.  Cook the cauliflower until fork tender.  Use whatever method you are most comfortable with.  I get good results in the microwave.

2-3 cups almond milk, unsweetened (use whatever milk floats your boat)

Pour your milk into a blender and add 1/2 of your cooked cauliflower.  Liquify until smooth.
**Rev. 10/30/14:  I've started using my immersion blender instead of my counter-top blender.  So much easier! Remove a cup of your steamed cauliflower from the pot and set aside.  Add your milk and blend with immersion blender. Add the cup of cauliflower to your blended soup base.

Add 1/2 tsp. white ground pepper.  This pepper has got a little kick so use less to start and taste before adding more. 

Your soup base is finished.  See?  Easy!

Now, gather together the following vegetables:

Mushrooms, onions, bell peppers, spouted lentils  I like my mushrooms Portobello and sliced thickly, my onions, sweet....my bell peppers in all the rainbow colors and my lentils sprouted to about 1 - 1/2 inch.


Clean, slice, dice and saute them in your favorite way.  I use a bit of non-stick spray to coat my pan...and Parkay Spray on my veggies, along with a few of Mrs. Dash's no-salt seasonings.   I do not use oil or butter (apologies to all my Paleo family and friends).  I encourage you to use what tastes best to you.  If you have never tried the water saute method, this is the perfect dish for a 'first time.'

I like my veggies al dente and sauteed long enough to incorporate all the natural flavors.   You can cook them for as little or as long as you like and then turn the heat way down and cover with a lid. 

In the microwave or on the stove top, bring your cauliflower soup to a soft simmer.   Ladle hot soup into serving bowl.  Then scoop up and add 1-2 cups of cooked veggies.  Enjoy!

**Notes from experience:  The first time I made this soup, I kept it very simple, adding only a few bits of diced red bell pepper and some lightly sauteed mushrooms.  The next few times I made it, I started using different vegetables and lots more of them.  As you can see in the photo, may ratio of sauteed veggies is much greater than the amount of soup base.  Broccoli is another great veggie to add to this mix but it will change the flavor of the dish because of its own distinct flavor.  I eat lots of broccoli so decided to keep this dish broccoli-free.  Zucchini squash is another wonderful addition to this saute mix and I've used shredded carrots, too.


Final note:  When I make enough to have leftovers, I refrigerate the soup and the veggies separately...and reheat them separately, as well.  The soup presents more lovely when the soup is ladled first...and veggies added to the soup.  I'm just sayin'. 


Followers